How to implement feature flagging using Azure App Configuration in React application
Feature flagging is a crucial technique for controlled software releases, allowing developers to toggle features dynamically. This guide explores implementing feature flagging in React applications using Azure App Configuration. By leveraging Azure App Configuration, developers can efficiently manage feature flags and configuration settings, enabling seamless feature rollouts and targeted user experiences without extensive code modifications.
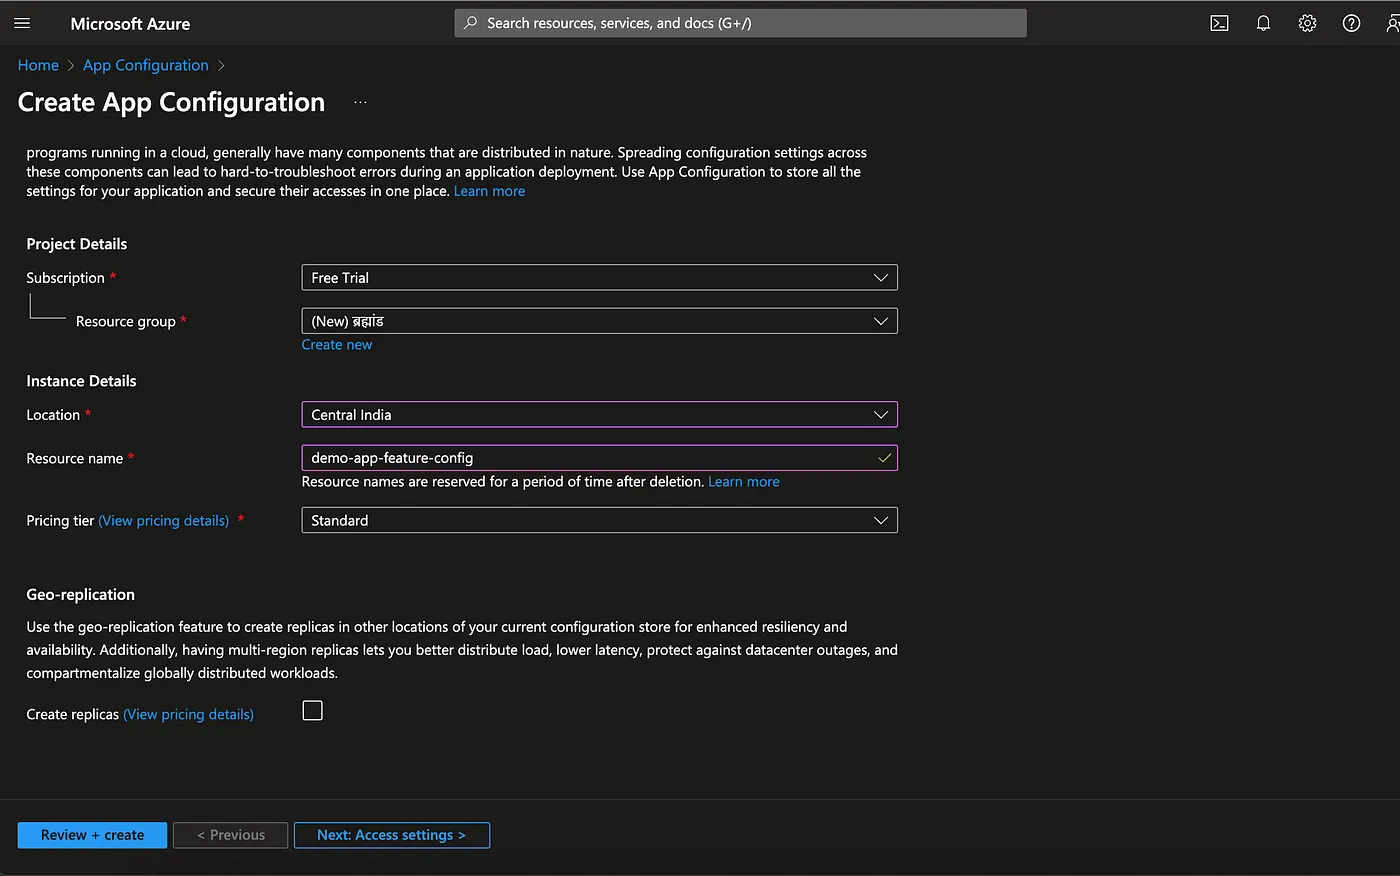
Step 1: Setup Azure App Configuration
Create an Azure App Configuration instance:
- Choose your desired subscription for billing.
- Choose an existing resource group or create a new one.
- Select a location for your instance that best fits your application needs from compliance to resiliency features.
- Type in a name for the instance.
- Select a pricing tier for your instance based on your application type.
For the purpose of this demo, I’ll be using a free pricing tier but you can choose standard tier for production apps where features like geo replication are needed. Geo-replication feature creates replicas of your current configuration store in other locations for enhanced resiliency and availability.
6. Click Review+Create and then Create button to create the service.
Create a feature flag:
- Go to your newly created app configuration service in azure portal.
- Select Feature manager menu item under Operations heading from menu.
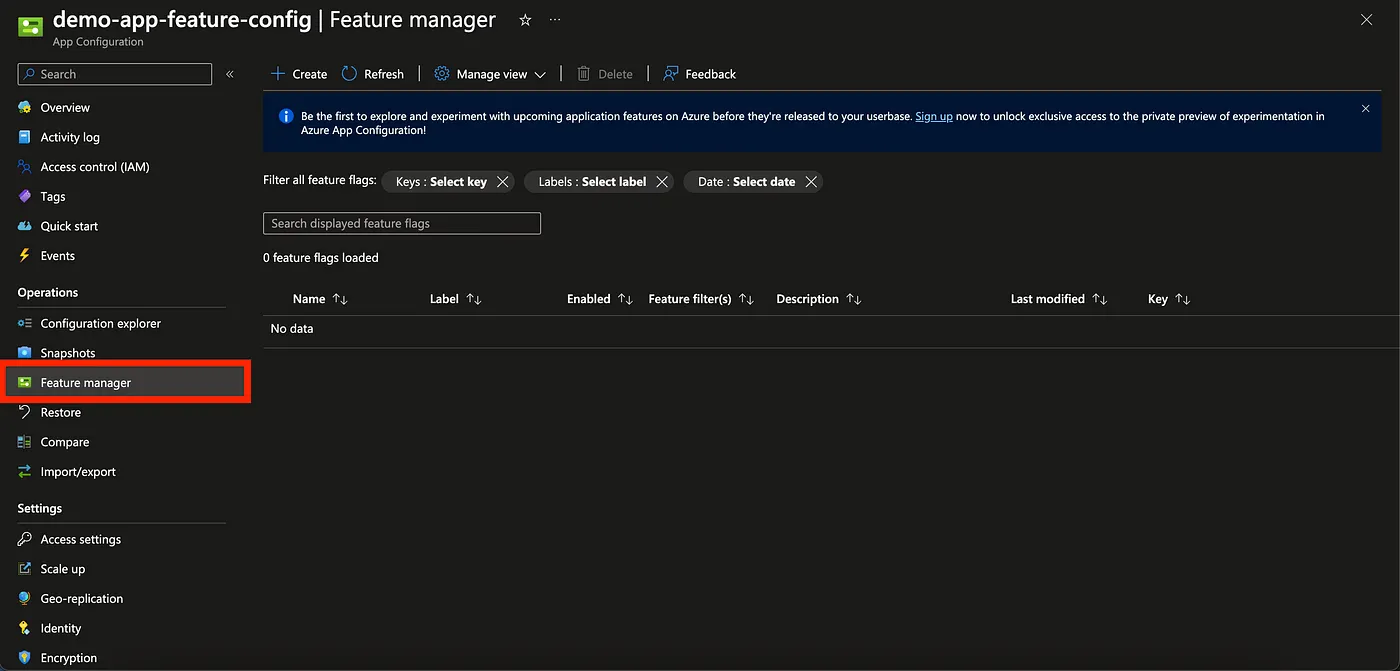
3. Select Create button now to open up new feature flag creation form.
4. Select state of feature flag (True/False) using checkbox.
5. Type in feature flag name. (Use a descriptive and meaningful name).
6. Add labels (optional).
7. Add a description for the feature flag. (optional).
8. Enable feature filter (optional). This is useful for creating conditional feature flags which can be helpful when performing staged rollouts. A conditional feature flag allows you to enable the feature flag for some users while disabling it for others. For the demo, I am leaving this as unchecked.

Step 2: Install Azure App Configuration SDK for javascript in React app
Install @azure/app-configuration npm package to your app.
npm install @azure/app-configuration
Step 3: Start consuming feature flags inside React app
Create react context file AppConfigContext.tsx and paste the code below:
import { createContext, useContext, useState, useEffect } from "react";import { AppConfigurationClient } from "@azure/app-configuration";interface AppConfigContextType { appConfigClient: AppConfigurationClient | null; getConfig: (key: string) => Promise<boolean | null>;}const AppConfigContext = createContext<AppConfigContextType>({ appConfigClient: null, getConfig: async () => null, // Default implementation});interface AppConfigProviderProps { children: JSX.Element;}export const AppConfigProvider = ({ children }: AppConfigProviderProps) => { const [appConfigClient, setAppConfigClient] = useState<AppConfigurationClient | null>(null); useEffect(() => { const fetchAppConfigClient = async () => { const client = new AppConfigurationClient( "<YOUR APP CONFIG ENDPOINT>" ); setAppConfigClient(client); }; fetchAppConfigClient(); }, []); const getConfig = async (key: string): Promise<boolean | null> => { if (!appConfigClient) return null; try { const response = await appConfigClient.getConfigurationSetting({ key }); if (response && typeof response === "object") { return JSON.parse(response.value!).enabled; } else { return null; } } catch (error) { console.error("Error fetching configuration:", error); return null; } }; return ( <AppConfigContext.Provider value={{ appConfigClient, getConfig }}> {children} </AppConfigContext.Provider> );};export const useAppConfig = (): AppConfigContextType => useContext(AppConfigContext);Get the app config endpoint from azure portal by navigating to Access settings > Access Keys > Read-only keys and copying the connection string.
You can now replace this string in AppConfigContext.tsx.
Consume the keys in your react app components:
import { useEffect, useState } from "react";
import reactLogo from "./assets/react.svg";
import viteLogo from "/vite.svg";
import "./App.css";
import { useAppConfig } from "./AppConfigContext";

function App() {
  const [displayWelcomeGreeting, setDisplayWelcomeGreeting] = useState<
    boolean | null
  >(null);
  const appConfigInstance = useAppConfig();
  useEffect(() => {
    const fetchFeatureFlag = async () => {
      if (appConfigInstance) {
        const flag = await appConfigInstance.getConfig(
          ".appconfig.featureflag/displayWelcomeGreeting"
        );
        setDisplayWelcomeGreeting(flag);
      }
    };
    fetchFeatureFlag();
  }, [appConfigInstance]);

  return (
    <>
      <div>
        <a href="https://vitejs.dev" target="_blank">
          <img src={viteLogo} className="logo" alt="Vite logo" />
        </a>
        <a href="https://react.dev" target="_blank">
          <img src={reactLogo} className="logo react" alt="React logo" />
        </a>
      </div>
      <h1>Vite + React</h1>
      {displayWelcomeGreeting && <h2>Welcome to my App!</h2>}
      <div className="card">
        <p>
          Edit <code>src/App.tsx</code> and save to test HMR
        </p>
      </div>
      <p className="read-the-docs">
        Click on the Vite and React logos to learn more
      </p>
    </>
  );
}

export default App;
By following these steps, you can implement feature flagging in your React application using Azure App Configuration. Remember to handle errors and edge cases appropriately, and consider security best practices for handling sensitive feature flag configurations.
All the code changes are published in this repository:
https://github.com/ankpaw/app-config-demo
Next Steps
You can implement caching to reduce the number of calls to Azure App Configuration service.
Did you enjoy this post?
Comments (0)
No comments yet. Be the first to start the discussion!